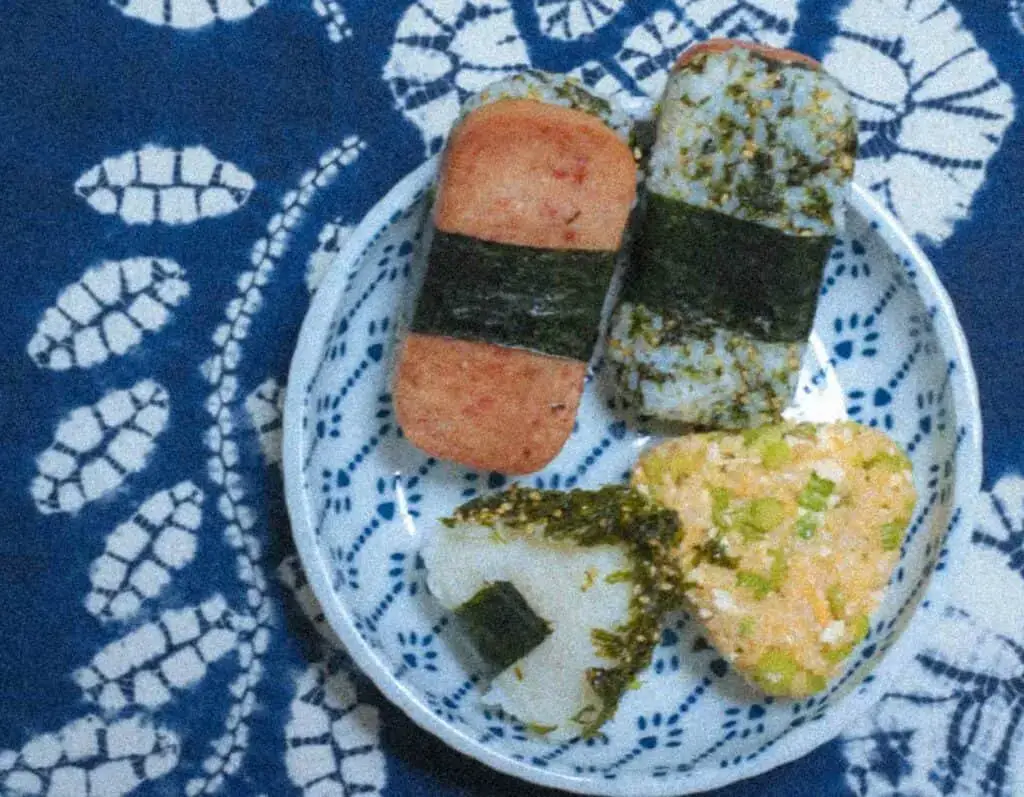
How to Make Onigiri Balls
Onigiri is a traditional Japanese dish made of rice. It is a healthy and light snack that can be a fun appetizer for parties or part of your lunchbox, and the best news is that it is prepared easily!
With these simple steps, you will be able to make perfect onigiri balls:
1. Cook rice
2. Season the rice
3. Shape the rice into balls
4. Wrap in nori
5. Add fillings
I will provide detailed information about each step and some additional tips that can make onigiri even taste better and look more interesting.
What You’re Going to Need
- A pot,
- A bowl,
- Rice,
- Furikake seasoning,
- Nori.
Step 1 - Cook Rice
Rice is the main ingredient of onigiri, and you can pretty much use any type, including any good sushi rice. If you have grown accustomed to making sushi with a rice cooker, then all the better. However, you don't need to have one in order to make good rice. A simple pot is all that is needed.
First of all, the rice has to be washed thoroughly. Take a bowl, fill it with cold water and pour the rice into it. Start swirling it, and you will see that the water will start to get murky. Repeat this process by changing the water until it remains clear after swirling.
Once you are done with the washing, take the pot, fill it with water and bring it to a boil. There should be enough water for the rice to be submerged. Once it starts boiling, lower the temperature and add rice. It will most likely be indicated on the packaging how much time is needed for it to cook, but generally, it is around fifteen minutes.
Tip: After the rice is cooked, take the pot off the burner and leave it in hot water to rest for another fifteen minutes or so. This will make it even more tender.
Step 2 - Season the Rice
Take a bowl and pour the hot rice into it. Traditionally, onigiri is seasoned with furikake spices (a blend of bonito flakes, salt, sugar, seaweed, and sesame,) but you can get creative and add any spice that you like. You have probably added a certain amount of vinegar if you have made sushi in the past. That can work for onigiri as well.
After adding all the desired spices, with your spoon or bare hands, stir the mixture gently, but at the same time, don't be too slow while performing this step because onigiri is best made while the rice is still warm.
Step 3 - Shape the Rice Into Balls
Before starting this, it is necessary to fill a bowl with water and rub your hands with salt. This will prevent the rice from sticking to your hands and make sculpting comfortable. Every time you feel that your hands are starting to get dry, soak them into the bowl and rub salt again.
Take a portion of rice in your hands and slowly start shaping. You will see that it is incredibly mouldable. When it comes to how much one portion should be, this is completely up to you. But if you are making it for a party, an onigiri ball should be of similar size and weight as sushi.
When you create a chunk of rice, it should sit on the palm of your hand, while with the fingers of your other hand, you should slowly shape it into a ball. Don't press too hard, as the chunk will fall apart and cool down. Cool rice is much less mouldable, and reheating the seasoned rice will ruin the flavor.
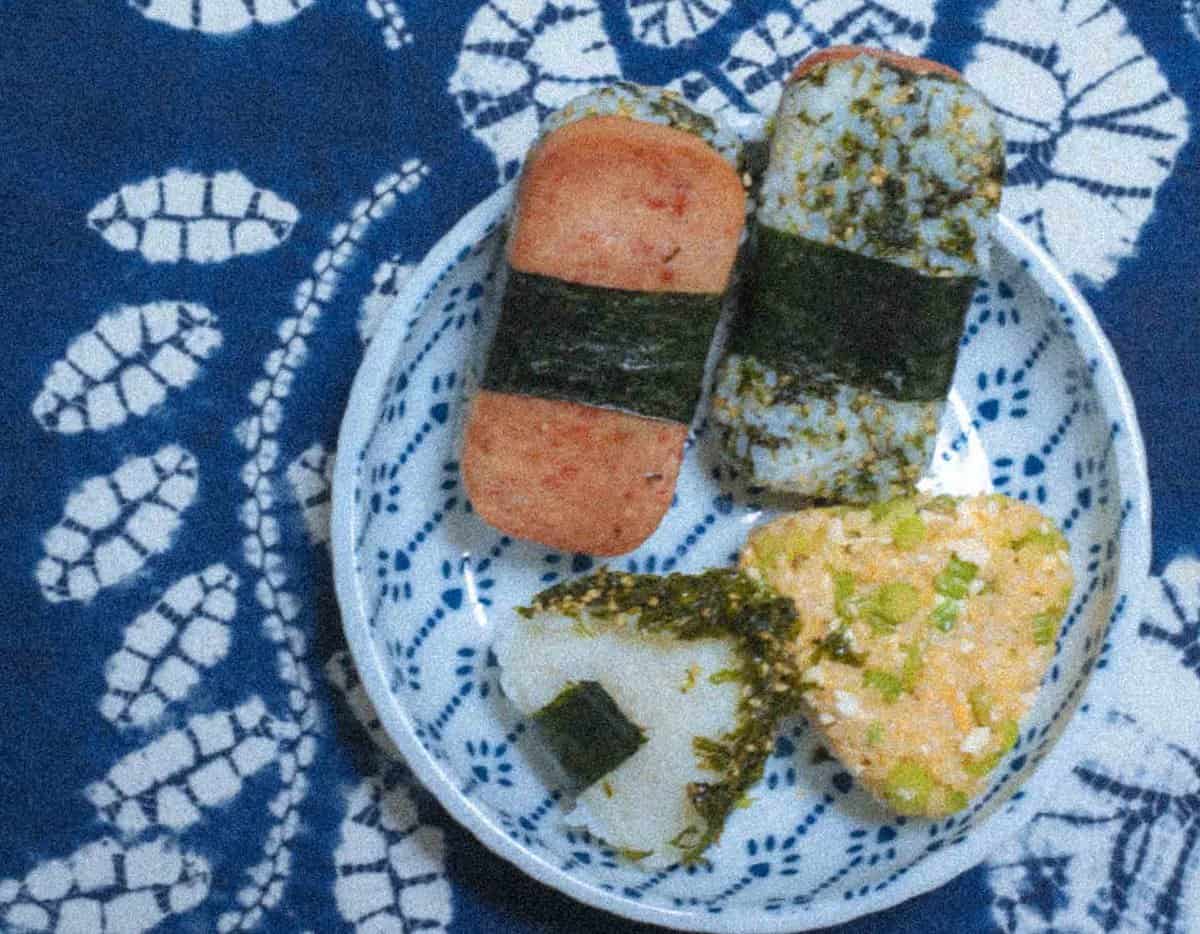
Tip: One of the best things about onigiri is that you can engage your creativity. The shape doesn't necessarily have to be a ball. You can mold it into any geometric shape, and people have even gone further and started making little panda bears and other animals.
Step 4 - Wrap in Nori
Once you are done with sculpting, take a leaf of nori, place it at the bottom of onigiri and fold it towards the middle. Nori is dried seaweed that has a subtly sweet taste and adds pleasant crunchiness to the texture.
Tip: You can get creative with nori as well. People have started making all kinds of smiley and animal faces. It can be a great activity for your children as well.
Step 5 - Add Fillings
This is a completely optional step since traditional onigiri consists only of seasoned rice and nori. However, what makes onigiri even more exciting is the fact that numerous fillings can be added.
If you are sculpting basic geometric shapes, the fillings can be added either before or after shaping. Simply make a hole in one side, insert filling, cover the hole with additional rice and adjust the shape if necessary. On the other hand, if you are planning to sculpt more complex shapes, this should be done before shaping the rice.
For fillings, it is best to search on the internet for ideas. You will see that there are countless recipes. Some of the most popular ones are tuna and mayonnaise, chicken and mayonnaise, and salmon. But you can let your imagination run free and even put in a sweet filling if you wish so.
Final Thoughts
Onigiri is a lovely Japanese healthy snack that is prepared fast, but what makes it even more interesting is the fact that you can get creative with it without needing any special ingredients. Once you get better at sculpting (not much time is needed,) your onigiri will be the center of attention at every party.