Kawaii Ice Cream Recipe
Do you love ice cream as much as I do? Then, you’re in for a treat because I’m about to share a kawaii ice cream recipe with you! Kawaii means "cute" or "adorable" in Japanese, and this recipe definitely lives up to its name. Not only is it delicious, but it’s also fun to make and even cuter to look at. So, let's get started!
Here are the steps to make a Kawaii ice cream:
- Make the ice cream mixture
- Add color and flavor
- Pour the mixture into molds
- Decorate your ice cream
- Freeze and enjoy!
In the rest of the article, I'll be guiding you through each step in detail, so you'll have no trouble making your own kawaii ice cream at home.
What You're Going To Need
- 2 cups of heavy cream
- 1 can of sweetened condensed milk
- Food coloring
- Flavor extracts (optional)
- Ice cream molds
- Decorating tools (Candy eyes, sprinkles, etc.)
- Waffle cones
- Freezer
Video Tutorial
Here's a video tutorial that demonstrates the entire process in just a few minutes
Step 1: Make the Ice Cream Mixture
The first step is to whip up the ice cream mixture.
Grab a big bowl and mix together 2 cups of heavy cream with a can of sweetened condensed milk until it's smooth and creamy. This is going to be the base of our delicious ice cream.
Can't you already taste the deliciousness? Yum!
Step 2: Add Color and Flavor
Now it's time to add color and flavor to your ice cream.
Adding color and flavor to your ice cream is an important step in making it kawaii and delicious. You can use any food coloring you like to achieve your desired shade, whether it's a pastel pink or a bright blue. And if you want to add some extra flavor, you can mix in some vanilla extract, strawberry extract, or mint extract, depending on your preferences.
Just be sure to mix the food coloring and flavor extract into the ice cream mixture thoroughly before putting it in the cones. This will ensure that the color and flavor are evenly distributed throughout the ice cream.
Step 3: Pour the Mixture Into Molds
Once you've added your favorite colors and flavors to the mix, it's time to pour it into your molds. Don't settle for boring old round molds; try out some fun shapes like hearts or stars to make your desserts extra special. Just remember to leave some space at the top of each mold for your decorations.
Trust me; you'll want to leave room for all the fun toppings you'll be adding later!
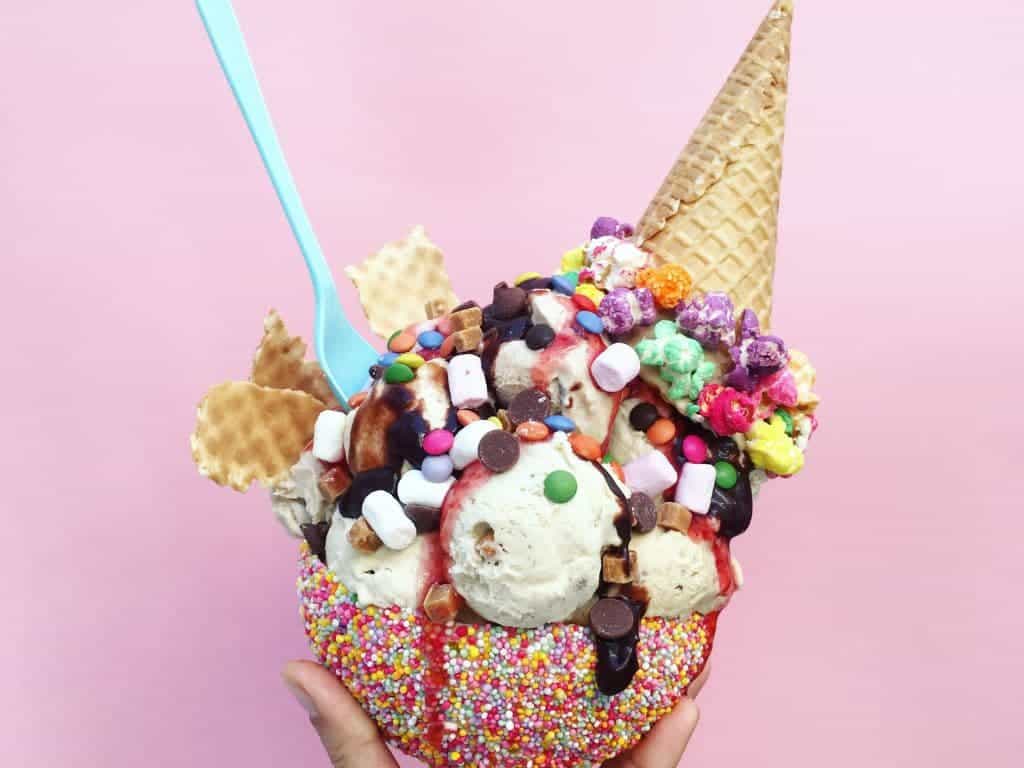
Step 4: Decorate Your Ice Cream
This is the fun part! This is where you get to let your creativity run the extra mile. Grab your favorite candy, sprinkles, and chocolate chips, and get ready to add some personality to your ice cream.
Don't be afraid to experiment with different toppings and try out new designs. Finish off your kawaii ice cream by adding more candy eyes and miniature candy pieces on top. You can also add a drizzle of chocolate sauce or caramel for extra flavor.
The sky's the limit when it comes to creating cute and delicious ice cream treats!
Step 5: Freeze and Enjoy!
Once you've finished decorating your ice cream, it's time to freeze it. Place your molds in the freezer for at least 4 hours or until they're fully frozen.
And voila! Your Kawaii ice cream is now ready to be devoured. Just take your mold out of the freezer, pop out your cute ice cream, and enjoy the sweet deliciousness you just made.
Tips to Take Your Kawaii Ice Cream Creations to the Next Level
Now that you know how to make Kawaii ice cream, let’s get to the important part – tips. Check out these helpful tips that will take your frozen treats from cute to downright impressive!
1. Alternative Molds
Don't have ice cream molds? No problem! You can use paper cups or silicone muffin cups instead. Just make sure they're sturdy enough to hold the ice cream.
2. Easy Removal
Most people struggle to remove their ice cream from the molds without ruining the If you are one of them too, read what follows next carefully.
For quick removal, simply run them under warm water for a few seconds before popping them out. This will make the process a lot easier and less messy.
3. Freeze Before Serving
To make sure the ice cream stays firmly in the cone, freeze them for a few hours before serving. This will help the ice cream hold its shape and prevent it from melting too quickly.
No more sipping on ice cream. Just bite into it!
4. Mix It Up
Get creative with your ice cream flavors and colors. Experiment with different combinations to create even more kawaii creations. The possibilities are endless!
5. Top It Off
Don't be afraid to go wild with the toppings. From gummy bears to fruit, there are endless ways to decorate your ice cream cones and take them to the next level. So have fun and let your imagination run wild!
Final Thoughts
There you have it! By just following these easy steps, you will be a Kawaii ice cream pro in no time!
Don't be afraid to experiment with different colors, flavors, and toppings to make your own unique creations. You can even have a competition with your friends to see who can make the cutest ice cream cone. This recipe is perfect for any occasion, whether it's a hot summer day or a cozy night with friends.
So, what are you waiting for? So, grab your ingredients and get ready to make some adorable and delicious ice cream!