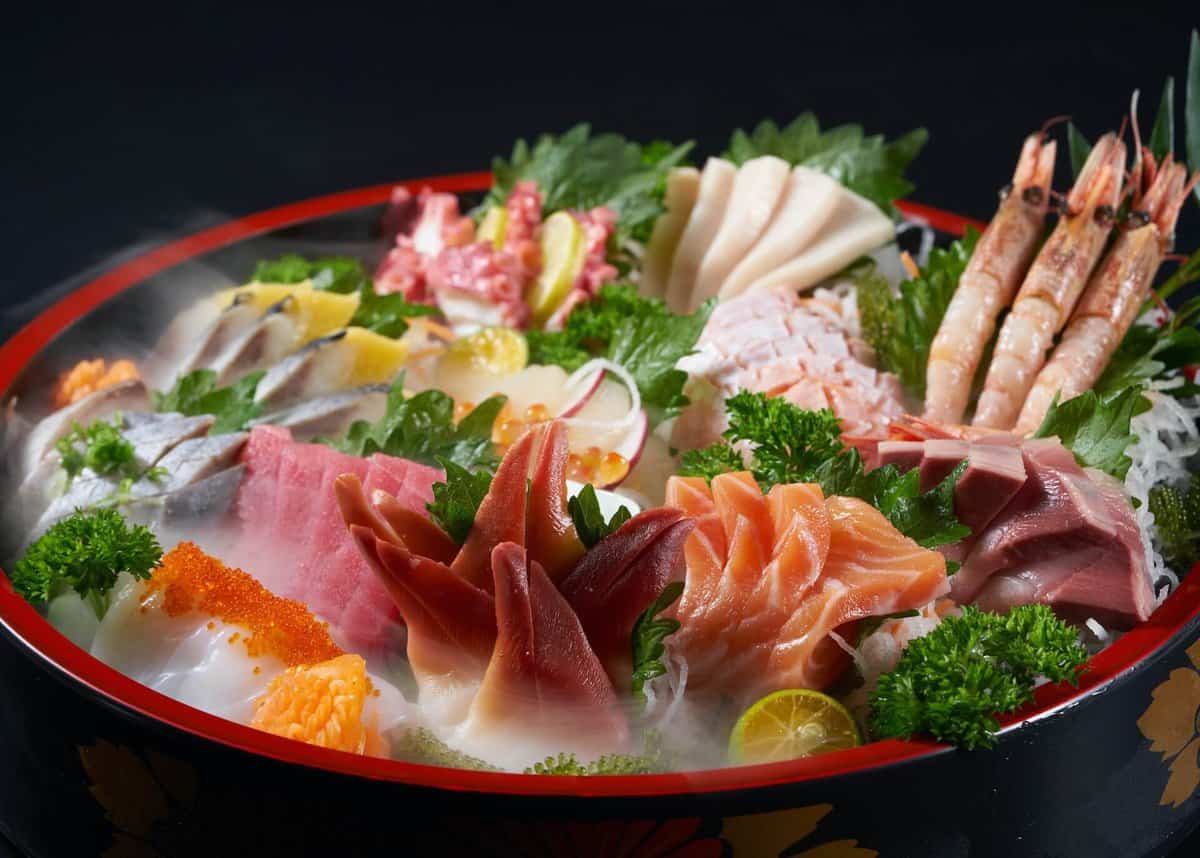
How to Make Sashimi?
Sashimi is a Japanese delicacy made from thinly sliced pieces of raw fish. However, there is a lot more to know when you want to recreate the flavors and presentation of Japanese cuisine.
Here is how to make a flavorful sashimi dish in 6 easy steps:
- Choose the type of fish,
- Prepare a sharp knife and cutting board,
- Opt between different slicing techniques and start cutting,
- Select the garnishes,
- Add the condiments,
- Serve and enjoy.
In the following text, I'll cover these steps in detail, so you can learn how to make amazing sashimi even on your first try.
Ingredients and Tools You'll Use in the Sashimi-Making Process
- Well-sharpen knife,
- Cutting board,
- 1 lb of chosen sashimi-grade fish,
- 3-4 shiso leaves,
- 1 daikon radish,
- 1 cucumber (optional),
- 1 carrot (optional),
- ½ of fresh lemon (optional)
- Wasabi,
- Pickled ginger,
- Soy (or Ponzu) sauce
Step 1 - Choose Tuna, Salmon, or Another Popular Fish Type as the Base for Your Sashimi
Since fish is the main ingredient of this dish, you must be especially careful when choosing the type. Several species are typically used in Japanese restaurants - all of which have different flavors. You can opt from:
- Tuna (bluefin, skipjack, yellowfin, or bigeye) - sashimi tuna taste range from strong meaty to more neutral flavor,
- Yellowtail - has a subtle buttery flavor,
- Salmon - salmon sashimi has a different texture than cooked salmon but tastes very similar to it,
- Horse mackerel - has a sweet but mild flavor.
Japanese cuisine recognizes other types of sashimi as well, made from scallops, octopuses, or sea urchins. However, besides being less popular, they are prepared differently than the ones mentioned here.

Tips for Purchasing a Fish
When choosing the fish, buy only from trusted fishmongers and make sure it is sushi or sashimi-grade, which means it's completely safe to eat raw. Keep in mind that raw fish doesn't smell or taste fishy - if it does, it may not be safe to eat in raw condition.
You can also opt for pairing different types and tastes together for a more aesthetic and interesting presentation.
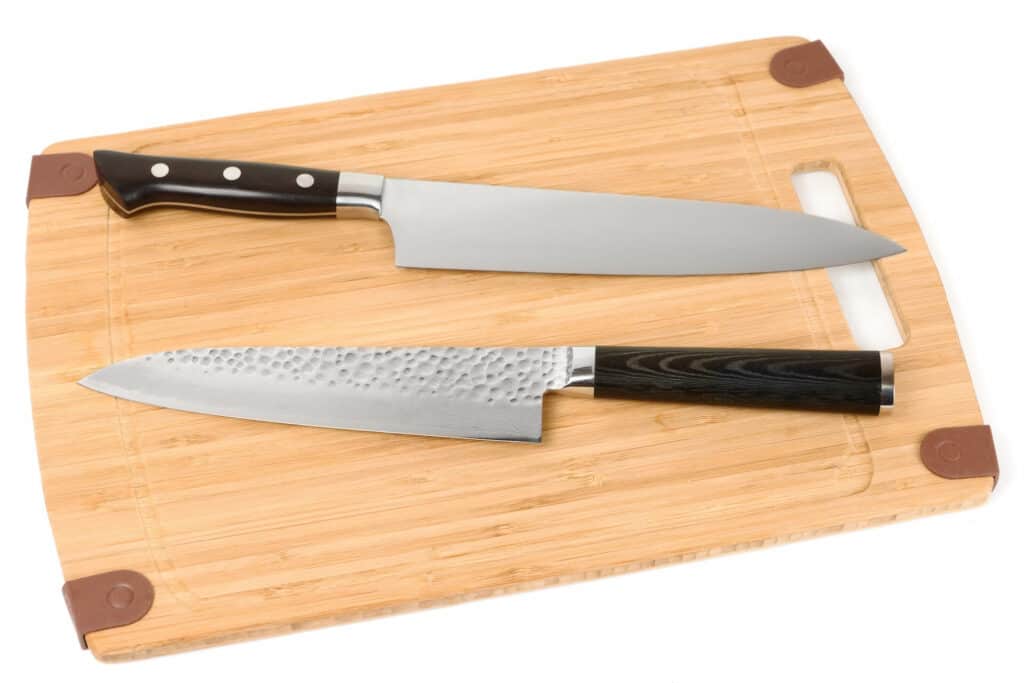
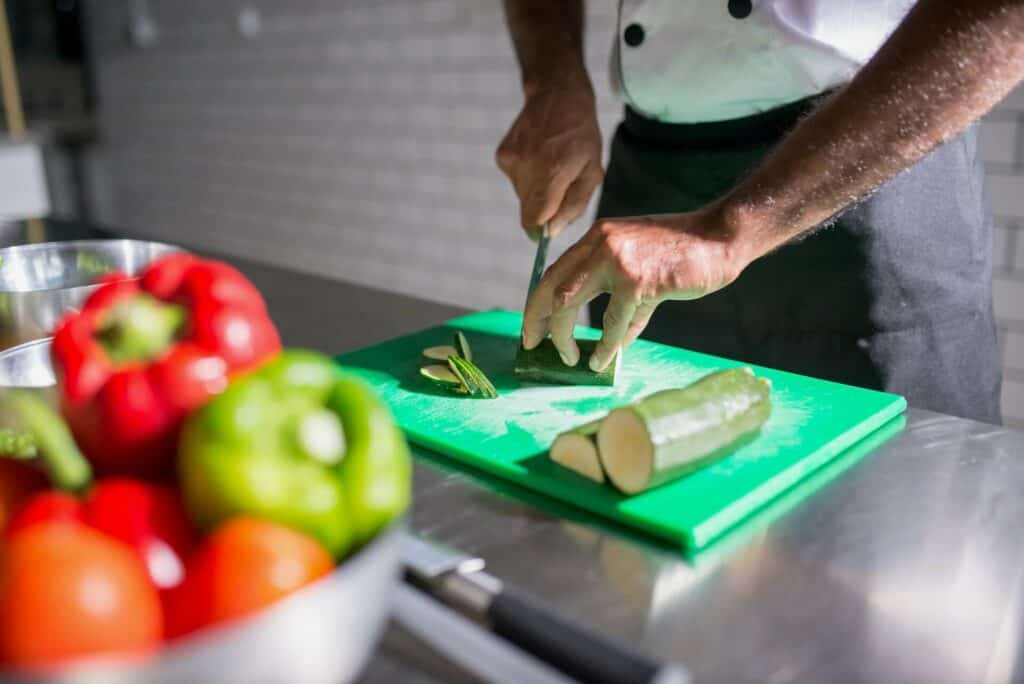
Step 2 - Make Sure You Have the Right Tools by Your Side
In order to preserve the right texture and taste of sashimi, you'll have to invest in a sharp, high-quality sashimi knife - that is, if you don't already have one among your kitchen tools.
Chefs in Japanese restaurants prefer specially designed Japanese-style knives, but it's not obligatory for you. A well-sharpened chef's knife is a good choice for those making this dish at home.
Additionally, make sure you have a clean cutting board at hand as well.
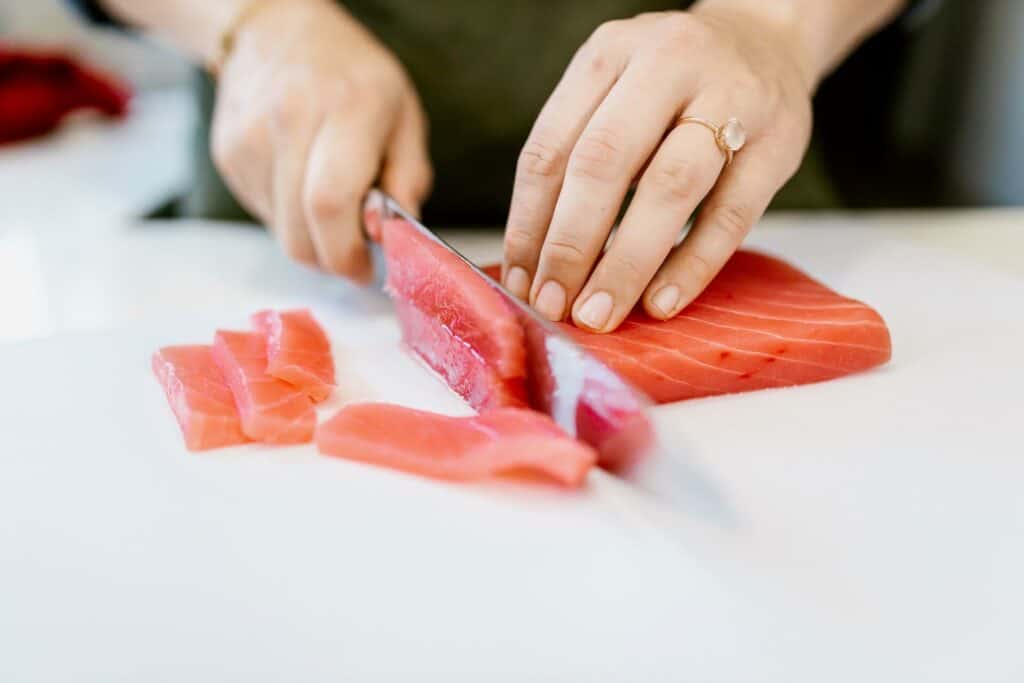
Step 3 - Select a Preferable Slicing Technique and Prepare the Fish
Scaling and trimming the fish is the most complicated part of sashimi preparation, one that is better left to the professionals. Otherwise, you may end up butchering the poor fish and making it unpresentable.
That is why when buying sashimi, find out if a fishmonger is willing to scale and trim the fish you buy - most of them will do it gladly. Note that it can and will make the preparation process much easier.
Once you get the fish trimmed and scaled, all that's left to do is slice it. In Japanese cuisine, there are many sashimi slicing techniques. The most popular is rectangular slices or hira-zukuri.
Start from the right side of the filet and slice in one motion by dragging the knife towards yourself; one cut should be approximately ¼ inch thick.
You can also opt for a thin slice or usu-zakuri, which is a better choice for thinner filets. Start from the left and cut through the fish almost horizontally.
Japanese chefs also use techniques such as ito or kaku-zakuri. However, hira and usu-zacuri are the easiest and the most common ways of preparing sashimi slices, especially when it comes to home chefs.
The important thing to remember is that presentation is important in Japanese cuisine. Therefore, no matter which slicing technique you choose, make sure all the slices look almost identical.
Tips for Storing the Fish
If you're not making sashimi right away, fish needs to be appropriately stored in a refrigerator. However, if you don't want to freeze it (which can impact the taste), make sure you make sashimi as fast as possible - in a maximum of two days.
Before slicing the pieces after removing them from the refrigerator, wipe all the excess water with a paper towel. Additionally, don't store filets on top of one another - if you lack space, place paper towels between them.
Step 4 - Decide Which Garnishes You Want to Serve With Sashimi
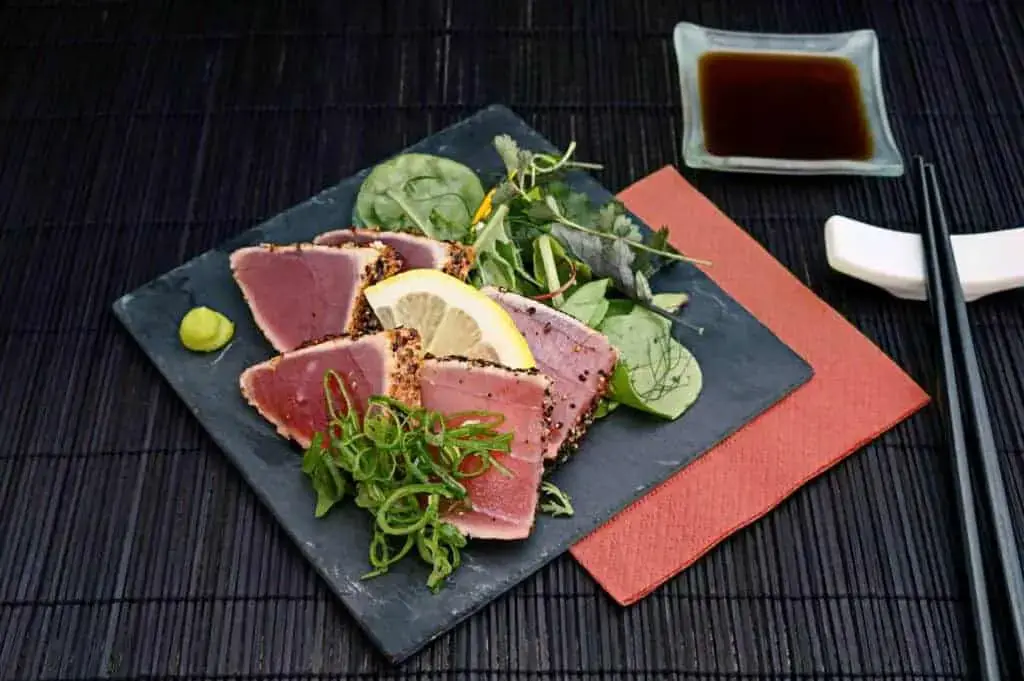
Traditionally, sashimi is served with tuna (shredded daikon radish) and shiso leaves. Peel the skin of the daikon and cut it using the slicer, then stack three to four daikon slices and cut them into thin strips. Place shredded daikon in water for fifteen minutes, then strain and remove moisture.
As for the shiso leaves, remember that they have more than just a decorative function - they taste refreshing and go well with the raw fish.
You can also opt to add fresh vegetables, such as cucumber or carrots. Shred them similarly to daikon and keep them stored in the fridge until ready to serve. Optional, you can add thinly sliced lemon.
Step 5 - Choose the Right Condiments for the Dish
Condiments characteristic of Japanese cuisine are wasabi and pickled ginger - both bringing spiciness into the mix, so make them part of the meal as well.
As for the dipping sauce, If you've opted for the traditional sashimi presentation, you should go with soy sauce. The soy sauce brings a perfect, rich umami taste that will go well with any type of fish you have in mind.
However, keep in mind that it's not the only option available. You can choose Ponzu sauce if you prefer a bit more citrusy flavor.

Step 6 - Arrange the Ingredients and Serve
The way of serving will depend on the ingredients you wish to use. If you're opting only for the daikon and shiso leaves, make a pile of shredded daikon on the side, lean the shiso leaves on them, and then place sliced fish over the shiso leaves.
If you wish to add other ingredients, place the shiso leaves and the fish in the middle of the platter, and arrange all the ingredients around them. Rather than placing garnishes with similar colors next to one another, ensure you mix them up a bit - you'll get a more pleasing aesthetic.
As for the condiments, have a special platter prepared for ginger and wasabi and a special bowl for the sauce you've chosen. Make several small piles of gingers and several small balls of wasabi.
Final Thoughts
When prepared right, this Japanese delicacy becomes one of the tastiest and healthiest meals you can make for yourself and your loved ones - and it's fairly easy to prepare! All you have to do is buy the sashimi-grade fish, choose garnishes and condiments, and you're good to go. Once you decide to try it out, just follow this simple guide, and make your presentation flawless.